Brian Gillespie from Hasport called me, and told me that he
and his son, Carter, wanted to run his swapped (of course) DA9 Integra at some
track events this winter. Carter wants to work on his closed-course driving
skills for track days and ‘time attack’ type events. This is a very positive step
for newer drivers, as track time builds driving skills that will help out
during the ‘daily grind’ on the street as well. Having good car control skills during
accident avoidance situations can save a lot of property damage and possible
injuries; there is no arguing those facts. And of course, tracking your swapped Integra can be a crazy-good fun too...
 The Gillespie crew has ‘swapped in’ a K24 donor engine from a CRV, and
added a JR supercharger that was a ‘spare’ in the Hasport parts bin. They
fabbed up a new intake, and installed a larger radiator to help with track day
abuse and those Phoenix afternoons in traffic. The power goal is a reliable 280-300
whp. Yeah, it’s good to be Brian’s kid! The five-speed gearbox has an LSD, and
required a cable-to-hydro conversion as well. Thanks Hasport!
The Gillespie crew has ‘swapped in’ a K24 donor engine from a CRV, and
added a JR supercharger that was a ‘spare’ in the Hasport parts bin. They
fabbed up a new intake, and installed a larger radiator to help with track day
abuse and those Phoenix afternoons in traffic. The power goal is a reliable 280-300
whp. Yeah, it’s good to be Brian’s kid! The five-speed gearbox has an LSD, and
required a cable-to-hydro conversion as well. Thanks Hasport!
Carter has been working on his 1993 Integra three door (DA9),
fixing the numerous worn and abused items that need attention on a twenty-some year
old Acura. He has been driving it daily on a Progress CS2 coilover system with
a softer ‘DD’ springs (350#/350#). They have also added a homegrown ‘splitter’
to help ‘pin’ the front end and add some stability at speed. For a track setup
with an inexperienced driver, we suggested a stiffer 550/550 ‘square’ setup.
These ‘square’ setups are predictable and forgiving for the newcomer, and are
plenty fast when set up properly.
 So we aired up the tires, a proceeded with a spring swap,
bumping up to the 550/550 rates. While the front wheels were off, Brian demo’d
his new ‘fender roller’ that bolts to the wheel hub and has a radius arm with a
plastic roller that presses behind the fender lip. Very cool. So my tired ol’ Stickball
bat may be retired soon.
So we aired up the tires, a proceeded with a spring swap,
bumping up to the 550/550 rates. While the front wheels were off, Brian demo’d
his new ‘fender roller’ that bolts to the wheel hub and has a radius arm with a
plastic roller that presses behind the fender lip. Very cool. So my tired ol’ Stickball
bat may be retired soon. We unhooked the rear sway bar, and got the car back on the
floor, set the ride heights and started chasing the alignment settings. We measured camber and adjusted the front & rear toe, and checked the rear for symmetry using
some 1” square aluminum tubing. We sighted down the tubing and checked for 'like' toe settings on the left & right. Well, we needed to do a little dialing-in to get the
L&R sides matched up, but the result is worth the effort.
We unhooked the rear sway bar, and got the car back on the
floor, set the ride heights and started chasing the alignment settings. We measured camber and adjusted the front & rear toe, and checked the rear for symmetry using
some 1” square aluminum tubing. We sighted down the tubing and checked for 'like' toe settings on the left & right. Well, we needed to do a little dialing-in to get the
L&R sides matched up, but the result is worth the effort.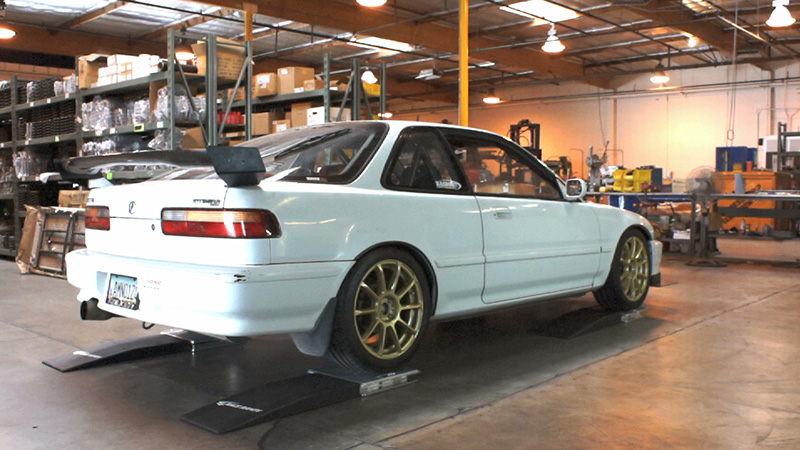
 After dialing in camber and toe settings, we pushed the
Teggy up on the chassis scales for some corner weighting. This is why we
unhooked the rear swaybar end link, so it would not impact the corner-weighting
process.
After dialing in camber and toe settings, we pushed the
Teggy up on the chassis scales for some corner weighting. This is why we
unhooked the rear swaybar end link, so it would not impact the corner-weighting
process.  We set the cross-weights at 50%, as this is the best starting point
for a track car. With the 50%/50% corner weights, have a best shot at ‘like’
handling for left and right corners. Predictability is our handling goal for a
newer driver, as this builds confidence and lap times with minimal surprises.
Carter & Brian can dial in a more neutral setup as Carter’s skills grow.
We set the cross-weights at 50%, as this is the best starting point
for a track car. With the 50%/50% corner weights, have a best shot at ‘like’
handling for left and right corners. Predictability is our handling goal for a
newer driver, as this builds confidence and lap times with minimal surprises.
Carter & Brian can dial in a more neutral setup as Carter’s skills grow.
Alignment settings as follows:
Ride height, 12.25-12.50" range
Front camber, -3.0*/-2.7* (L/R)
Front toe-in, .00" (total)
Rear camber, -2.0*/-2.2* (L/R)
Rear toe, -.06" (total)
Total weight, 2492# (w/o driver)
We opted to leave the Progress rear sway bar disconnected, until Carter was comfortable with the basic racing line at the course. Having no effective rear sway, Carter had predictable understeer, and zero surprises in the handling department, just what's needed for new drivers learning a new course. It's a quick fix to stop in the paddock and reattach the rear end link, and the sway bar is back in service. The rear sway will reduce body roll and move the chassis balance closer to 'neutral' for quicker turn-in and some faster laps.
Carter's first track event was busy, wrestling with mechanical gremlins including low boost & tuning issues, as well as swap-related details. Carter & Brian did get some of the 'new-build' issues sorted during the day, and had some good clean laps later in the event. Carter commented that the car was more stable than it had ever been before, and it was easier and waaay fun to drive. Just what you want to hear about a new suspension setup on a fresh project. To be continued...
Fastrax camber gauge:
http://progressauto.com/products/sfID1/14/sfID2/0/sfID3/0/productID/781


